
作者: 丹尼斯Ruest, 工程硕士/IPQDF
技能等级: 进阶DIY (需要电气经验)
电压: 120/240V 分相
系统尺寸: 5千瓦 (千瓦)
1. 介绍: 了解你的目标
5kW 太阳能系统是一项重大投资,可为大部分中型家庭供电. 运用14 面板 (而不是 13) 创建平衡的字符串配置——两个相等的字符串 7 每个面板——简化接线, 改善电平衡, 并使故障排除变得更加容易.
购买零件之前, 你必须决定: 并网或离网?
- 并网: 您仍与公用事业保持连接. 你可以卖回电力 (净计量) 但为了安全起见,系统会在电网停电期间关闭 (反孤岛效应). 5kW 并网系统通常产生 20-25 每天千瓦时, 足以抵消平均家庭使用量.
- 离网: 您完全独立于公用事业. 需要大量电池组 (48V@200Ah或以上). 系统运行 24/7 与网格无关. 5kW离网系统可以运行冰箱, 灯, 电子产品, 甚至小型空调或循环井泵.
放弃: 用电工作很危险. 请咨询有执照的电工以进行最终连接. 对于这种规模的系统,您当地的司法管辖区需要许可证. 本文仅供参考,不能取代有执照的专业人士.
2. 为什么 14 面板? 偶数优势
运用 14 面板 (两串 7) 提供显着的好处 13 面板:
| 特征 | 13 面板 (7+6) | 14 面板 (7+7) |
|---|---|---|
| 琴弦平衡 | 不相等的字符串 | 完美平衡 |
| 电压匹配 | 不同组串电压 | 相同的串电压 |
| 汇流箱 | 需要不同的熔断器 | 两个字符串的熔断相同 |
| 表现 | 一根弦产生更少 | 双方产量相等 |
| 扩展性 | 尴尬的配置 | 稍后轻松添加对 |
| 总功率 | ~5.0kW (配备 385W 面板) | ~5.4kW (配备 385W 面板) |
同 14 x 385W 面板, 你得到5,390在— 5kW 以上的良好缓冲器,可在阴天时提供帮助,而不会导致大多数 5kW 逆变器过载 (通常接受高达 6,000W 的直流输入).
3. 工具 & 材料清单
所需工具:
- 钻头 & 带六角钻头的冲击起子
- 插座组 & 扳手 (公制和标准)
- 剥线钳/切割钳 (10 AWG 至 2/0 具有 AWG 能力)
- 具有高达 600V 直流电压能力的数字万用表
- 光伏 (太阳能) 安全手套 (绝缘的)
- 扭力扳手 (英寸-磅和英尺-磅)
- 螺柱查找器 (电子的)
- 粉笔线
- 导管弯管机 (1/2″ 和 3/4″)
- 鱼带
- 电缆接线片压接工具 (推荐用于电池电缆的液压)
5kW 系统的材料 (14 面板):
太阳能电池阵:
- 太阳能电池板: 14x 360W-400W 面板 (总计5.0-5.6kW). 选择高效单晶硅面板,最大限度减少屋顶空间.
- 货架系统: 铝轨, L 型脚, 中夹, 端夹, 闪烁 (铁岭, 尤尼拉克, 或 SnapNrack). 确保您所在地区的风/雪荷载额定值.
- 接地: 接地片, WEEB 垫圈, 或铜线.
直流电:
- 汇流箱: 具有 2 串功能的防风雨外壳.
- 串保险丝: 15每个串都有一个保险丝或断路器 (2 需要, 相同的评级).
- 光伏线: 10 AWG 或 8 用于面板互连的 AWG, 6 本垒打 AWG.
- 直流断开: 30A 或 60A 户外额定安全开关.
逆变器:
- 并网选项: 5kW组串逆变器 (SMA, 太阳能边缘, 伏能士) 或 5kW 微型逆变器 (Enphase IQ8+). 验证最大直流输入可容纳 ~5.4kW.
- 离网选项: 5带内置充电控制器的 kW 分相一体机 (古瑞瓦特SPF 5000 这是, MPP太阳能LVX6048, Victron MultiPlus-II). 必须接受 48V DC 输入.
交流电气:
- 交流断路器面板: 主面板或子面板.
- 双极断路器: 30A用于太阳能反馈.
- THHN线材: 10 AWG 铜 (颜色编码: 黑色, 红色, 白色的, 绿色).
- 交流断开: 户外安全开关 (如果代码需要).
仅离网:
- 电池组: 48V磷酸铁锂 (磷酸铁锂) 电池. 最小100Ah (5kWh), 推荐200Ah (10kWh) 用于夜间负载. 示例: EG4LL, 奖杯电池, 派隆科技.
- 电池电缆: 2/0 AWG 或 4/0 带接线片的 AWG 焊接电缆.
- T 类保险丝: 250A 或 300A 带支架.
- 母线: 用于电池连接的重型铜母线.
- 电池架: 服务器机架或货架系统.
耗材:
- 钢丝螺母 / 万戈连接器
- 扎带 (户外抗紫外线)
- 导管 (日程 40 PVC或EMT)
- 渗透密封胶 (屋顶填缝剂)
- 电工胶带
- 标签机 / 抗紫外线标签
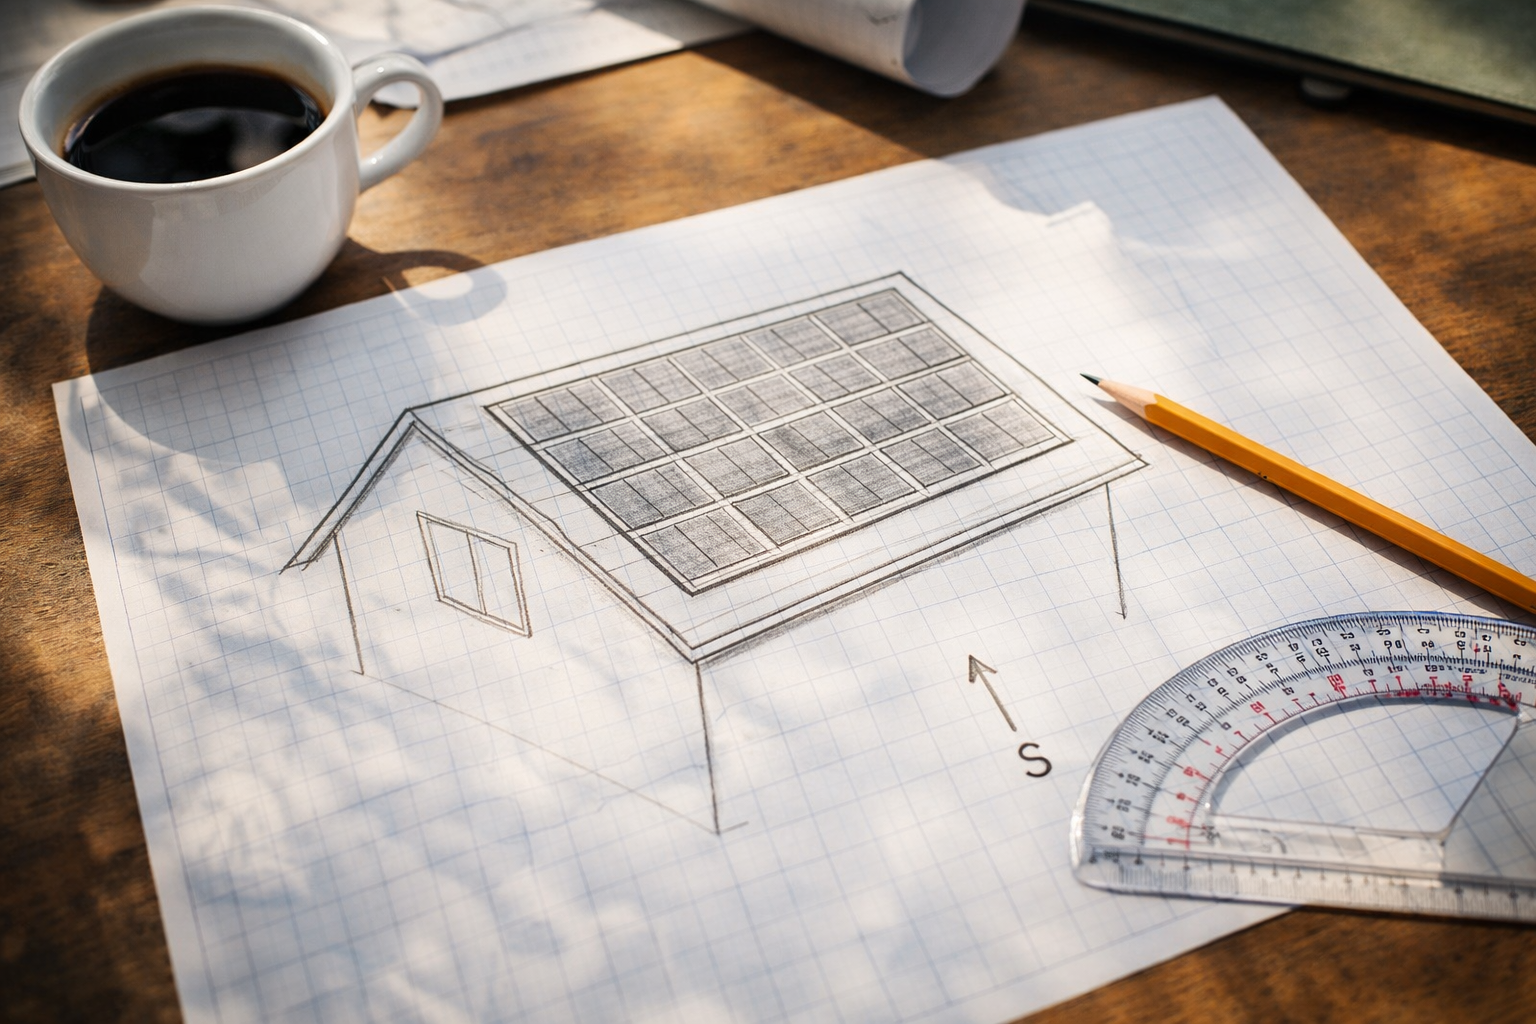
4. 系统设计 & 布局 (文书工作阶段)
抬起单个面板之前, 你必须在纸上完成设计. 这是获得许可证所必需的,并确保您的组件安全地协同工作.
步骤 4.1: 屋顶评估
- 方向: 北半球最好朝南. 东南或西南将会失败 10-15% 生产.
- 沥青: 大多数屋顶都可以工作, 但陡峭的坡度 (大于45°) 需要特殊的安全设备.
- 健康)状况: 确保您的屋顶至少有 10 剩余寿命. 安装太阳能后重新屋顶费用昂贵.
- 障碍物: 测量距烟囱的距离, 通风口, 和天窗. 你需要 18-36 阵列周围有几英寸的间隙用于消防通道 (检查本地代码).
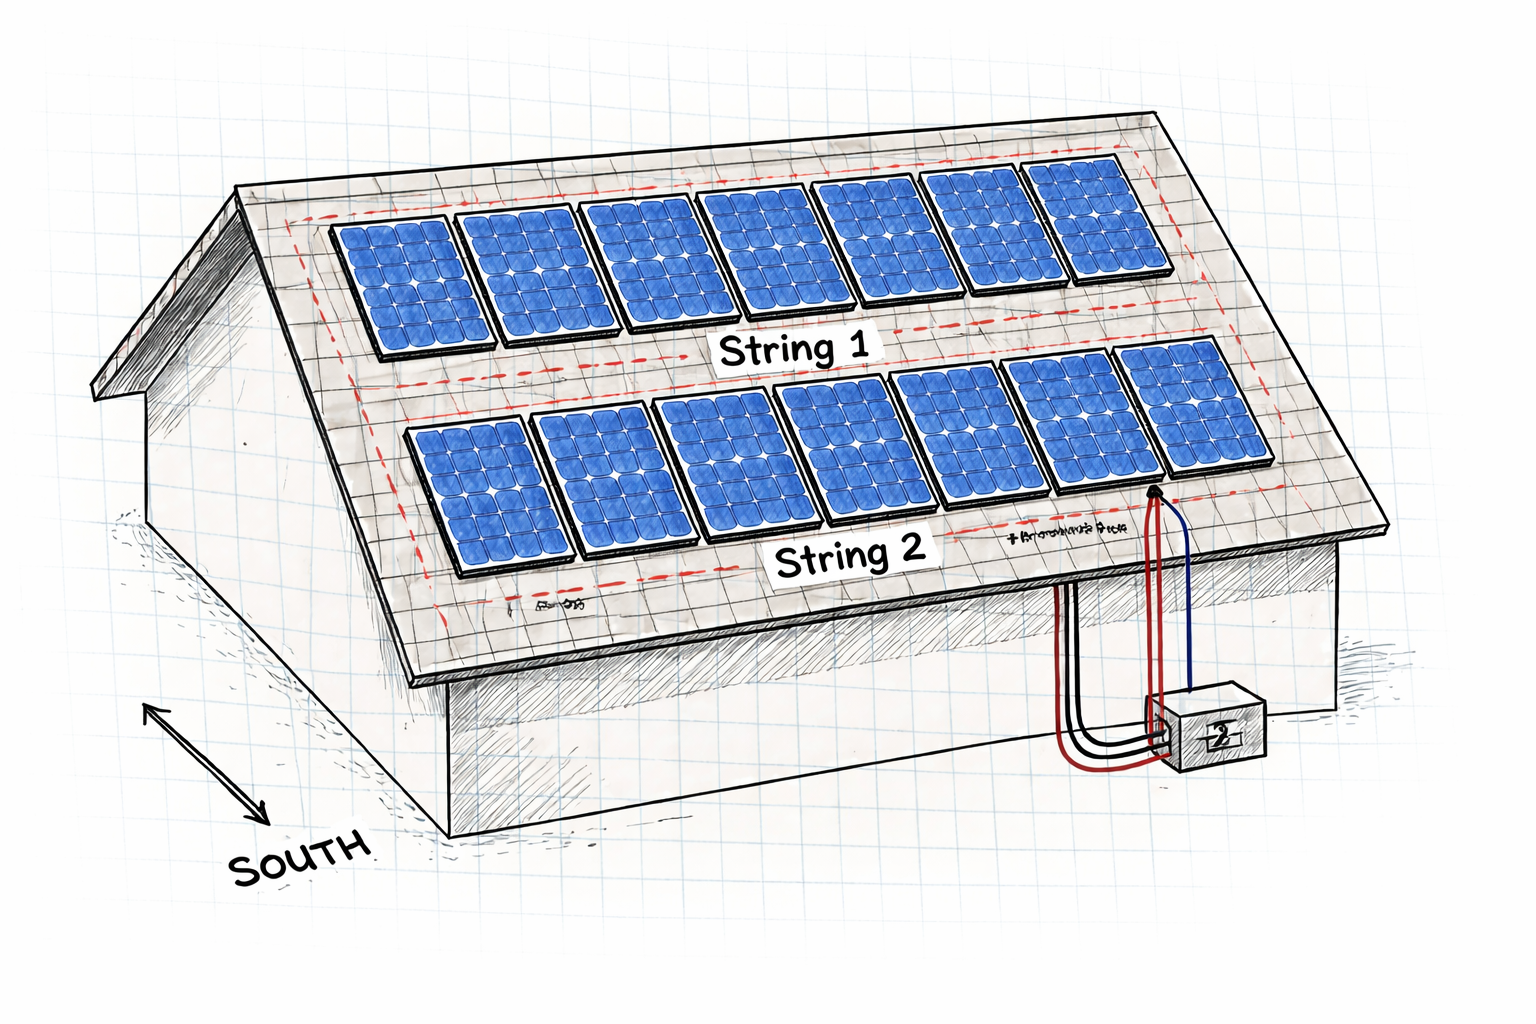
- 布局: 同 14 面板, 你可以将它们排列成两行 7 (横向) 或七行 2 (纵向). 两排 7 最常见.
步骤 4.2: 字符串大小计算 (完美平衡)
同 14 面板, 你创建了两个相同的字符串 7 每个面板.
- 面板电压: 大多数现代 400W 面板都有 Voc (开路电压) 40-45V左右.
- 字符串A: 7 面板 x 45V = 315V (操作) / 365在 (最高冷温度)
- 字符串 B: 7 面板 x 45V = 315V (操作) / 365在 (最高冷温度)
- 总功率: 两个串在汇流箱处并行汇合, 产生相同的电压和平衡的电流.
批判的: 使用字符串大小计算器 (可在逆变器制造商网站上找到) 您所在位置的低温记录. 如果计算不正确,寒冷会增加电压并可能损坏逆变器. 带 7 片琴弦, 低于典型的 600V 最大逆变器输入,您将有足够的安全裕度.
步骤 4.3: 产量预估
5.4kW系统 (14 x 385W) 在一个区域 5 高峰日照时数将产生:
- 日常的: 5.4千瓦 x 5 小时 x 0.8 (系统损失) =21.6 千瓦时/天
- 每月: 21.6 千瓦时x 30 =648 千瓦时/月
- 每年: 因季节而异, 通常 7,000-9,000 千瓦时/年
这涵盖 60-100% 平均家庭使用率取决于效率.
步骤 4.4: 允许
访问您当地的建筑部门:
- 显示屋顶尺寸的场地平面图
- 面板布局图 (14 面板清晰显示)
- 电气单线图
- 设备规格表
- 结构计算 (如果需要的话)
在购买设备或开始安装之前等待批准.
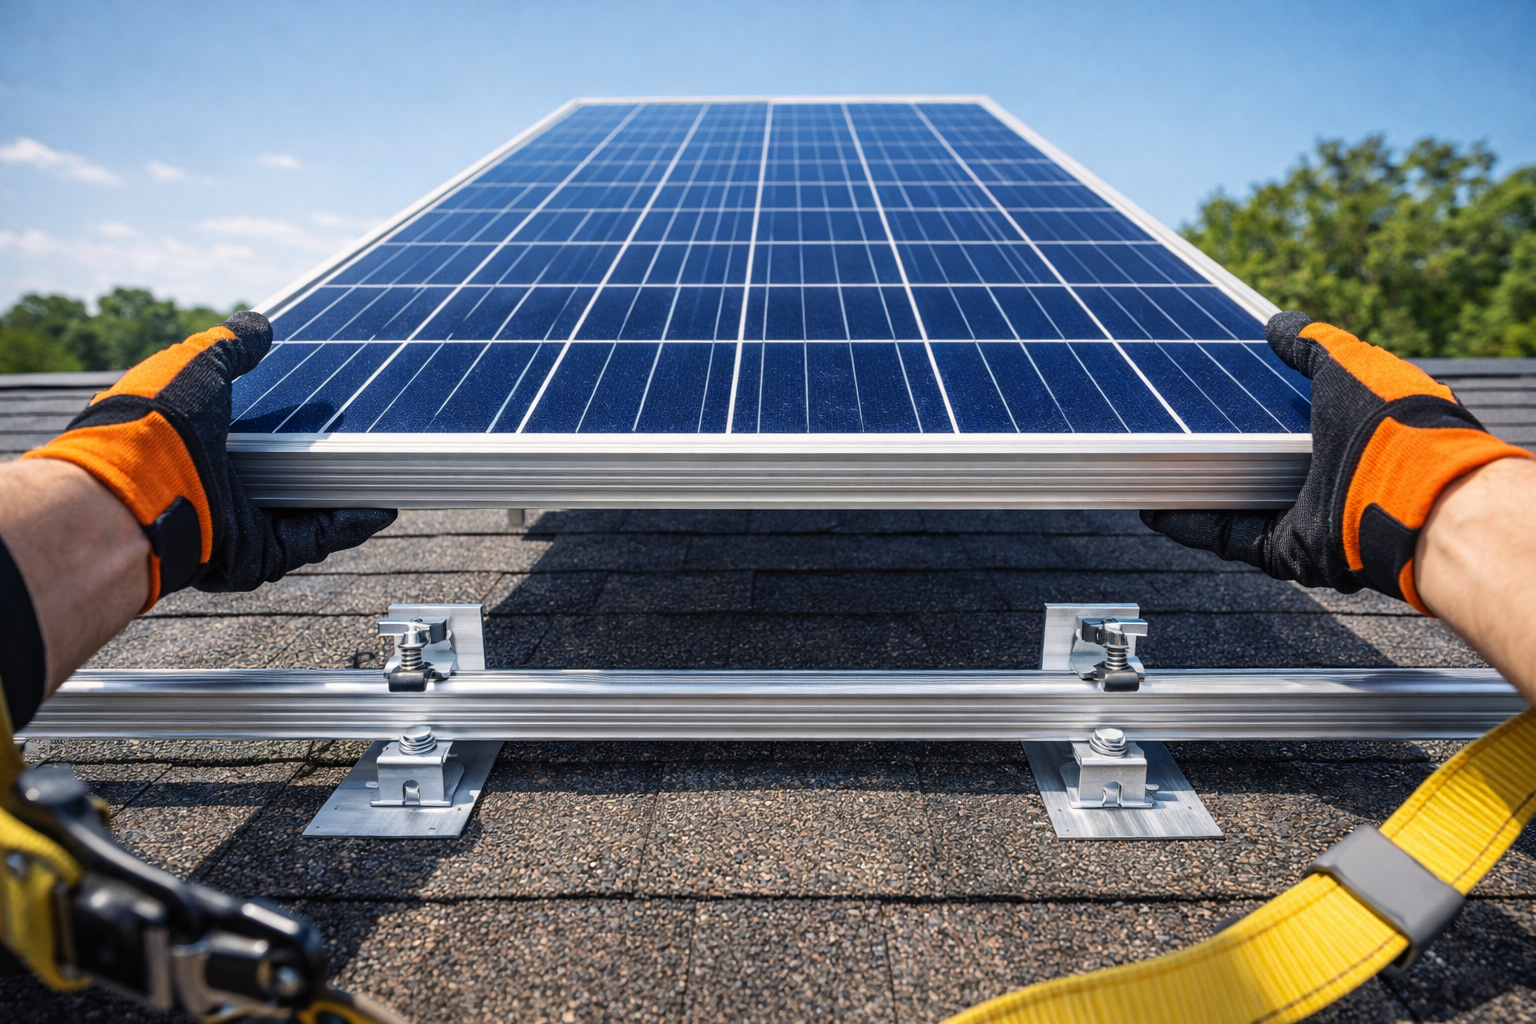
5. 安装货架 (安装硬件)

货架系统是太阳能电池阵列的基础. 5kW 系统 14 面板重量约为 650-850 磅并且必须承受风的升力.
步骤 5.1: 找到椽子
- 使用电子螺柱查找器来定位椽子. 在屋顶区域用粉笔线标记它们.
- 标准椽间距为24″ 在中心. 如果你的间距更宽, 你需要结构加固.
- 清楚地标记所有椽子位置 - 每个安装点都需要它.
- 为 14 面板成两排, 您需要在每个椽子与导轨的交叉点处安装点.
步骤 5.2: 安装闪烁
- 小心地提起安装座所在的木瓦. 使用扁钢避免木瓦开裂.
- 将铝制防水板完全滑到木瓦下方, 顶部边缘位于上方路线下方.
- 防水板应该有内置密封剂,或者您应该在其下方涂抹屋顶填缝剂.
步骤 5.3: 安装 L 型脚
- 在防水板和椽子中心钻一个导向孔. 在钻头上使用挡块以防止钻得太深.
- 插入方头螺栓 (通常为 3/8″ x 4″ 不锈钢) 带内置垫圈.
- 拧紧但不要过度拧紧. 目标是压缩防水板而不使其变形.
- 用额外的屋顶填缝剂密封螺栓头.
步骤 5.4: 安装导轨
- 使用 T 型螺栓和盖将铝制横轨固定到 L 型脚上.
- 为 14 面板分为两排 7, 您需要两个水平导轨来覆盖阵列的整个宽度.
- 确保导轨左右两侧和前后完全水平. 使用 4 英尺水平仪.
- 如果您的运行长度超过可用轨道长度,请使用内部接头连接轨道部分. 确保接头紧密且笔直.
安全提示: 始终佩戴带有屋顶锚的安全带. 从屋顶坠落可能致命.
6. 安装太阳能电池板
步骤 6.1: 舞台面板安全
- 使用面板升降机将面板提升到屋顶上, 屋顶挂钩, 或小心地递上它们.
- 同 14 面板, 系统地工作——一次放置一排面板.
- 将面板正面朝下放在泡沫垫上,以在准备接线时保护玻璃.
步骤 6.2: 预接线 (可选但推荐)
- 如果可以访问, 安装前将 MC4 延长电缆连接至面板接线盒.
- 这在地面上或面板翻转时比安装时更容易.
- 为 14 面板, 你会有 14 积极和 14 消极导致组织.
步骤 6.3: 位置面板
- 从阵列的一个角开始. 将第一个面板放在导轨上.
- 跨行工作, 然后开始第二行.
- 面板应放置在导轨上,框架放置在夹具上.
步骤 6.4: 用夹子固定
- 中夹: 用于面板之间. 他们将两个相邻面板的框架夹在导轨上. 您大约需要 22 中夹.
- 端夹: 用在每个导轨的末端以固定最后一个面板. 你需要 4 每个导轨的端部夹具 (8 全部的).
- 按照制造商规格拧紧所有夹具 (通常 15-20 英尺-磅). 扭矩不足有面板被吹走的风险; 扭矩过大可能会使框架破裂.
步骤 6.5: 将阵列接地
- 使用WEEB (洗衣机电气设备债券) 刺穿导轨和面板框架上的阳极氧化涂层的夹子.
- 或者, 使用列出的接地片将连续的裸铜接地线粘合到每个导轨上.
- 将阵列接地连接到家庭接地电极系统.
7. 电气接线 (直流侧)
[图像: MC4 连接器卡扣在一起的特写, 然后是一个图表显示 2 相同的字符串 7 面板合并在汇流箱中]
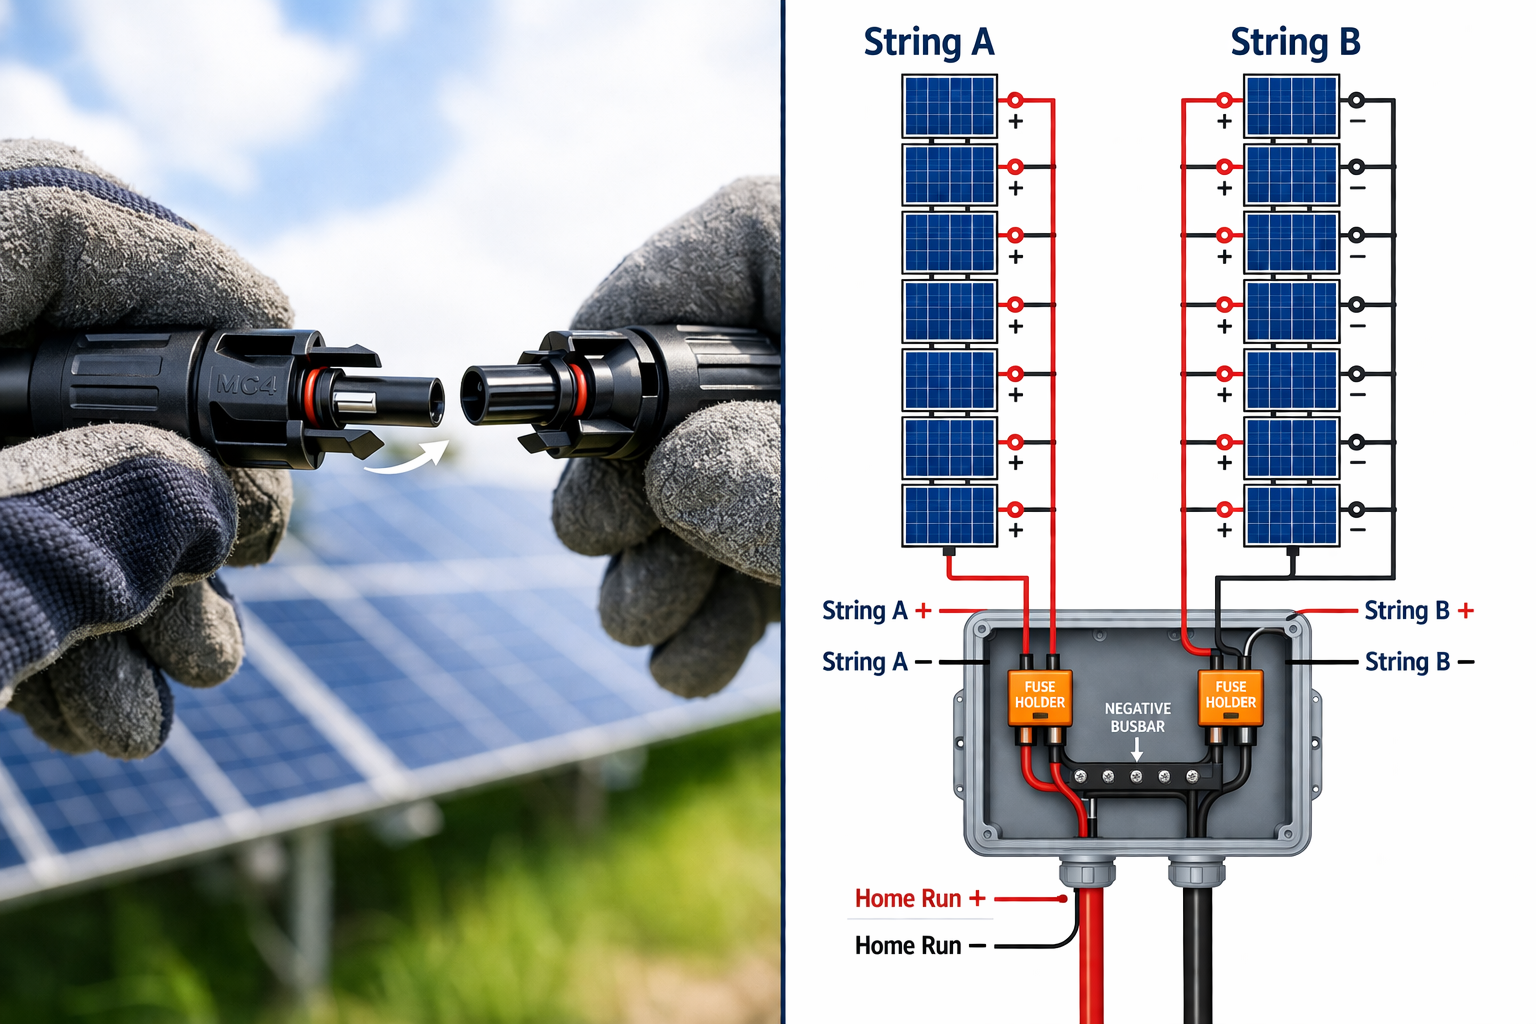
同 14 面板, 你创建了两个完美匹配的字符串 7 每个面板.
步骤 7.1: 配置字符串
- 字符串A (7 面板): 连接正极 (+) 面板的 1 至负值 (-) 面板的 2, 等等 7 面板. 最终将有一个免费的正面和一个免费的负面.
- 字符串 B (7 面板): 对剩余的部分重复该过程 7 面板, 遵循相同的模式.
步骤 7.2: 电压检查
- 连接逆变器之前, 在晴天用万用表测量每组串电压.
- A 串的读数应约为 280-320V DC (取决于面板规格和阳光).
- 字符串 B 应该读取相同电压 至字符串 A (1-2V以内).
- 记录这些值作为您的记录. 匹配电压确认接线正确.
步骤 7.3: 将电线连接至汇流箱
- 将每串的正极线和负极线向下延伸至汇流箱位置 (通常靠近阵列边缘或下面的墙上).
- 使用适合户外暴露和阳光照射的光伏线.
- 清楚地标记每对线对: “字符串A+”, “字符串 A -“, “字符串B+”, “字符串 B -“.
步骤 7.4: 安装汇流箱
- 将防风雨汇流箱安装在阵列附近的墙壁上或屋顶边缘.
- 盒子里面, 将每个字符串正极连接到15保险丝或断路器 (两个字符串相同).
- 将每个串负极连接到公共负极母线.
- 组合输出连接到单根正极线和负极线 (“ “本垒打”).
步骤 7.5: 运行本垒打 运行至 DC 断开
- 从汇流箱, 跑步6 任意波形发生器 光伏线 (正反) 向下至安装在逆变器附近外部的直流断路开关.
- 在电线裸露处使用导管进行保护.
- 给这根电线贴上标签 “光伏阵列输出5.4kW” 在两端.
8. 安装逆变器 & 交流面板
步骤 8.1: 选择位置
- 室内 (车库/地下室) 是延长逆变器使用寿命的理想选择.
- 户外需要 NEMA 4X 额定逆变器.
- 位置必须靠近主配电板,以尽量减少交流电线的铺设.
- 对于离网, 位置必须靠近电池组 (电池电缆必须短).
步骤 8.2: 安装背板
- 安装 4′ x 4′ 3/4 片″ 墙上的胶合板. 如果规范要求,请涂上阻燃涂料.
- 这提供了坚固的安装表面并组织设备.
步骤 8.3: 安装逆变器
- 逆变器重量: 5kW 单位重量 50-100 磅. 使用方头螺栓插入螺柱.
- 保持制造商指定的间隙 (通常 6-12 各边英寸) 用于气流.
- 确保逆变器水平.
步骤 8.4: 安装交流面板
- 如果对关键负载使用子面板 (离网), 将其安装在逆变器旁边.
- 如果对主面板进行回馈 (并网), 确保主面板有一个开放的双极断路器插槽.
步骤 8.5: 安装断开连接
- 安装直流断路器 (汇流箱与逆变器之间) 在逆变器的视线范围内.
- 安装交流断路器 (逆变器与主板之间) 如果当地法规要求.
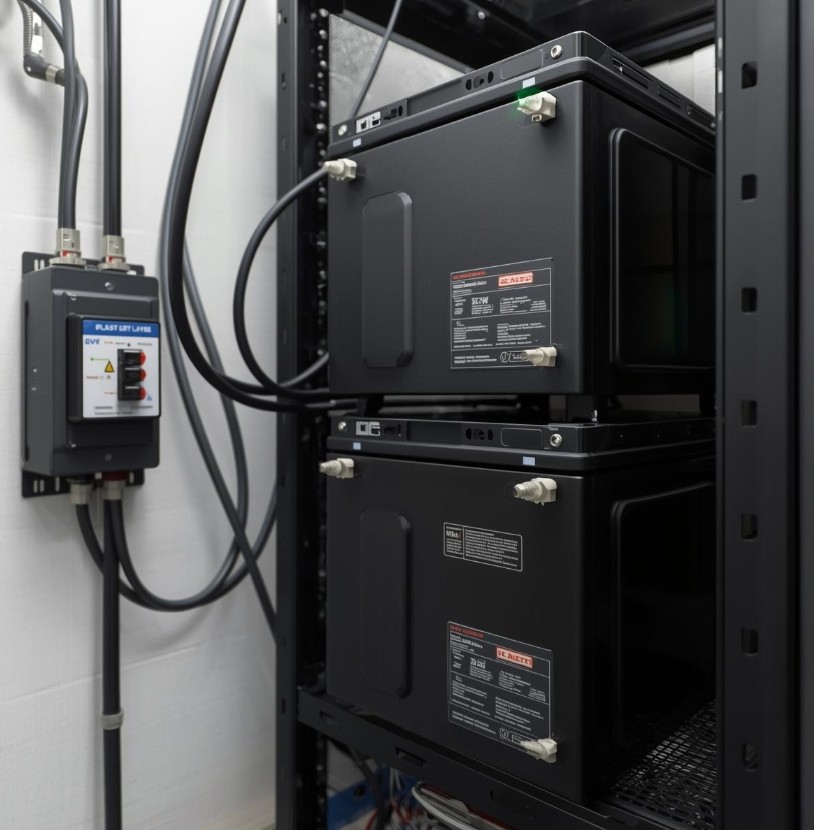
9. 电池组接线 (仅离网)
48V 的 5kW 逆变器104 Amps 在满负荷. 这需要严格的布线和安全保护.
步骤 9.1: 选择电池配置
- 48V系统: 大多数 5kW 离网逆变器需要 48V 电池组.
- 容量: 5kW负载过夜运行 (说 10 部分负载小时数), 您需要至少 10kWh 的存储空间.
- 典型设置 14 面板: 配备 5.4kW 太阳能, 你可以为大量的电池组充电. 受到推崇的: 48在@200Ah (10kWh) 最低限度, 48电压@300Ah (15kWh) 理想的.
- 配置选项:
- 4x 12V 200Ah 电池串联 = 48V @ 200Ah (10kWh)
- 8x 12V 200Ah 串并联 = 48V @ 400Ah (20kWh)
- 3x 48V 服务器机架电池并联 = 48V @ 300Ah (15kWh)
步骤 9.2: 放置电池
- 将电池放在架子或架子上. 切勿直接放置在混凝土地板上 (寒冷会损害它们).
- 确保足够的通风——电池会排出气体 (即使是在故障情况下的锂) 并产生热量.
步骤 9.3: 线状电池
- 使用2/0 任意波形发生器 或4/0 任意波形发生器 用于所有电池互连的焊接电缆.
- 使用液压压接钳将重型接线片压接到电缆上.
- 用于串联连接: 连接电池正极 1 接电池负极 2, 等.
- 对于并联串: 将所有正极连接到母线上, 所有底片都集中在母线上.
步骤 9.4: 安装 T 类保险丝
- 批判的: 在内部安装 T 类保险丝 12 电池正极端子的英寸.
- 保险丝选型: 逆变器最大持续电流x 1.25 = 保险丝尺寸. 对于104A× 1.25 = 最小 130A. 大多数 5kW 逆变器使用 200A-250A 熔断器来处理浪涌负载.
- T 类保险丝可防止短路——电池在故障时可提供数千安培的电流, 引起火灾或爆炸.
步骤 9.5: 连接逆变器
- 将正极电缆从保险丝连接到逆变器电池正极端子.
- 将负极电缆直接从电池负极母排连接至逆变器电池负极端子.
- 按照制造商规格拧紧所有连接.
步骤 9.6: 安装电池监视器 (可选)
- 安装基于分流器的电池监视器 (Victron BMV-712 或类似产品) 准确跟踪充电状态.
- 对于离网生活来说,了解剩余容量至关重要.
10. 交流接线 (并网 & 离网)
[图像: 电工在主配电盘中连接 30A 双极断路器, 贴上标签 “太阳能”]
步骤 10.1: 理解数学
5,400 瓦特 240 伏特 =22.5 Amps 连续的 (满输出功率为 5.4kW).
国家电气规范要求电路尺寸为 125% 连续负载:
- 22.5一个x 1.25 =28.1一
- 因此, 你需要一个30双极断路器 (下一个标准尺寸28.1A以上).
步骤 10.2: 线规选择
- 对于 30A 断路器, 使用10 AWG 铜线 (最低限度).
- 如果从逆变器到主面板的运行超过 100 脚, 升级到8 任意波形发生器 以防止电压下降.
- 使用颜色编码的 THHN 电线: 黑色的 (L1), 红色的 (L2), 白色的 (中性的), 绿色的 (地面).
步骤 10.3: 离网连接
- 运行L1, L2, 中性的, 和接地从逆变器输出到专用 “临界负载” 子面板.
- 在子面板中, 为您想要备份的电路安装标准 15A 和 20A 断路器 (冰箱, 灯, 因特网, 等等).
- 将这些电路从主面板转移到子面板.
步骤 10.4: 并网连接 (回馈)
- 运行L1, L2, 中性的, 和 从逆变器输出到主服务面板的接地.
- 将 30A 双极断路器安装在面板与主断路器相对端的开放插槽中 (这有助于 120% 规则).
- 将L1连接到断路器的一个端子, L2 到另一个航站楼. 将中性线连接至中性母线, 接地母线接地.
- 给断路器贴上标签 “太阳能5.4kW” 显然,未来的电工知道它是反馈的.
步骤 10.5: “ 120% 规则 (对于并网至关重要)
- 您的主面板母线有一个额定值 (通常为100A, 125一, 或200A).
- 主断路器和太阳能回馈断路器的总和不能超过 120% 母线额定值.
- 例子: 125母线 x 1.2 = 最大 150A. 100一个主要 + 30太阳能=130A, 这是可以接受的.
- 如果您的面板无法容纳此功能, 你需要一个 “供应侧水龙头” (主断路器之前的连接), 这需要电工.
11. 最终连接 & 上电顺序
[图像: 一个人在打开直流电源之前使用万用表检查直流电源断开处的电压]
步骤 11.1: 通电前检查
- 目视检查: 检查每根电线连接. 寻找松散的线束, 绝缘层有缺口, 或路线不正确.
- 极性检查: 验证阳性变为阳性, 到处都是负数到负数. 充电控制器或逆变器的极性反转会立即损坏它.
- 扭矩检查: 确保所有端子螺钉的扭矩均符合规格. 连接松动会导致电弧和火灾.
- 电压检查 (直流): 测量直流断开处的电压. 两个字符串应显示相同的电压 (2V以内).
- 电压检查 (交流): 确保主面板已通电且电压为 120/240V ±5%.
步骤 11.2: 开启顺序 (并网)
- 打开从主面板到逆变器的交流断路器 (电网电源).
- 等待逆变器显示屏上电并显示电网参数.
- 打开太阳能电池阵列的直流断路器.
- 逆变器应检测太阳能, 与电网同步 (需要 2-5 分钟), 并开始出口.
- 验证显示屏显示 “生产” 或 “并网” 正瓦数模式. 同 14 面板, 在太阳正午附近您应该会看到 4.5-5.4kW.
步骤 11.3: 开启顺序 (离网)
- 确保所有交流负载均已关闭.
- 打开直流电池断路器或先断开.
- 逆变器屏幕应该亮起. 验证电池电压读数正确.
- 打开太阳能直流断路器.
- 充电控制器应激活并开始为电池充电 (批量模式). 电压应该上升.
- 打开逆变器交流输出断路器.
- 开启小负载测试 (像一盏灯). 逆变器应该为其供电.
- 逐渐添加更大的负载来测试系统响应.
步骤 11.4: 观察初始操作
- 让系统运行 30 分钟. 留意:
- 异常噪音 (嗡嗡声, 电弧)
- 组件过热
- 显示屏上的错误代码
- 变频风扇正常运转
- 带有平衡弦, 两者应同等贡献 - 检查逆变器显示的每串数据(如果有).
12. 监控 & 性能测试
[图像: 智能手机屏幕截图显示了一个太阳能监控应用程序,发电量为 5.4kW, 26.5 每日总计千瓦时]
步骤 12.1: 连接监控
- 大多数现代逆变器都具有 Wi-Fi 或以太网连接.
- 下载制造商的应用程序并创建一个帐户.
- 使用序列号注册逆变器.
- 连接到您的家庭网络并验证数据传输.
步骤 12.2: 验证生产
- 在临近太阳正午的晴朗日子, 您的 5.4kW 系统应产生4.6千瓦 – 5.2千瓦 根据:
- 面板温度 (热板产量减少)
- 相对于太阳的角度
- 大气条件
- 如果产量明显降低, 检查阴影问题或接线问题.
- 比较两个字符串——它们应该显示几乎相同的输出.
步骤 12.3: 每日/年度期望
- 日常的: 22-32 千瓦时取决于季节
- 每月: 660-960 kWh
- 年度的: 8,000-11,000 kWh (因地点而异)
步骤 12.4: 离网特定监控
- 每天跟踪电池充电状态.
- 注意电池何时充满电 (指示数组大小是否足够).
- 注意电池何时电量不足 (指示是否需要更多容量).
- 如果需要延长整夜时间,请调整使用习惯.
13. 标签 & 文档
[图像: 干净的电气面板,每个断路器和电线上都带有专业印刷的标签]
为了安全起见,代码需要特定的标签:
所需标签:
- 直流断开: “光伏系统断开 – 5.4直流千瓦”
- 交流断开: “太阳能交流电源断开 – 5.4千瓦”
- 反馈断路器: “太阳能5.4kW” (在断路器本身上)
- 主面板: 警告标签注明 “该设备由多个来源提供 – 太阳能5.4kW” (如果回馈)
- 逆变器: 带有可见评级的制造商标签
- 汇流箱: “字符串A (7 面板)” 和 “字符串B (7 面板)” 每个保险丝上
- 所有导体: 识别每个端接点的电压和源
保留的文件:
- 许可批准文件
- 设备手册
- 标注实际电线长度的单线图
- 保修信息
- 监控登录凭据
- 紧急关闭程序 (在主面板附近张贴)
- 显示哪些面板属于哪个字符串的面板布局图
14. 要避免的常见错误
错误 #1: 线径过小
- 5.4kW 系统产生大量电流. 运用 14 用于电池连接或长时间直流运行的 AWG 电线会导致电压下降和火灾风险.
- 解: 始终使用压降计算器并遵循 NEC 载流量表. 同 14 面板, 你的本垒打电流更高——使用 6 AWG 最小值.
错误 #2: 忽略温度对电压的影响
- 寒冷的温度会增加面板电压. 25°C 时额定电压为 40V 的面板在 -10°C 时可达到 48V.
- 解: 使用您所在地区的创纪录低温计算组串电压. 带 7 片琴弦, 你有很好的安全裕度.
错误 #3: 在字符串中混合面板类型
- 串联面板必须具有相同的安培数. 并联电池板必须具有相同的电压.
- 解: 为整个 14 面板阵列购买相同的面板. 不要混合新旧.
错误 #4: 跳过电池保险丝 (离网)
- 电池在短路时可提供数千安培的电流. 不带保险丝, 电线会熔化并引起火灾.
- 解: 始终在内部安装 T 类保险丝 12 电池正极端子的英寸.
错误 #5: 不扭转连接
- “手紧” 电气连接不可接受. 连接弧线松动, 过热, 并失败.
- 解: 在每个接线片和端子上使用扭矩扳手. 记录扭矩值.
错误 #6: 接地不当
- 太阳能电池阵列会积聚静电荷并且容易受到雷击.
- 解: 粘合所有金属部件 (导轨, 面板框架) 并连接到家庭的接地电极系统.
错误 #7: 忘记了 120% 规则 (并网)
- 主面板母线过载会引发火灾.
- 解: 计算母线额定值, 主断路器尺寸, 安装前的太阳能断路器尺寸.
错误 #8: 不平衡弦
- 同 14 面板, 你有机会达到完美的平衡. 不要创建不均匀的琴弦.
- 解: 将两个字符串保持在 7 每个面板具有相同的电压和电流.
15. 何时致电专业人士
虽然本指南适用于 DIY 爱好者, 某些任务需要有执照的电工:
- 主面板修改: 如果您需要更换主面板或移动主断路器.
- 供应侧水龙头: 如果您的面板无法容纳 120% 规则, 供应方连接需要公用事业参与和专业安装.
- 服务升级: 如果你的主要服务太小 (例如, 60一项服务) 处理太阳能加上现有负载.
- 公用电表插座工作: 任何需要拉电表或修改电表插座的事情.
- 最终检验: 许多司法管辖区要求持证电工领取许可证并进行最终连接.
16. 系统规格摘要
| 元件 | 规格 |
|---|---|
| 系统尺寸 | 5.4 直流千瓦 (配备 385W 面板) |
| 面板 | 14x 360W-400W 单晶硅 |
| 所需屋顶空间 | 〜250-280平方英尺 |
| 字符串配置 | 2 的字符串 7 面板 (完美平衡) |
| 组串电压 | 每串: ~315V 工作电压 / 最大~365V |
| 直流线 (本垒打) | 6 AWG 光伏线 |
| 逆变器输出 | 5,000W 连续@240V (接受 5.4kW 直流电) |
| 交流断路器尺寸 | 30一个双极 |
| 交流电线 | 10 任意波形发生器 (8 适合长距离运行的 AWG) |
| 电池 (离网) | 48最小 V @ 200Ah (10kWh) |
| 电池电缆 (离网) | 2/0 AWG 或 4/0 任意波形发生器 |
| 电池保险丝 (离网) | T级, 200A-250A |
| 日产量 | 22-32 kWh (因地点而异) |
17. 结论
5kW太阳能系统使用 14 面板提供功率输出和电气对称性的完美平衡. 有两个相同的字符串 7 每个面板, 你得到:
- 接线更简单 具有相同的组件
- 更好的性能 平衡发电
- 更轻松地排除故障 当两个字符串表现相同时
- 更多动力 (5.4千瓦与5.0千瓦) 以最小的额外成本
- 未来扩展 通过添加成对的面板来发挥潜力
正确安装后, 该系统将为 25+ 岁月, 减少或消除电费, 并提高您的能源独立性.
最后的安全提醒:
-
开始前获得所有必需的许可
-
与合作伙伴一起工作——切勿独自在屋顶或高压环境下工作
-
在电气面板上工作时使用上锁/挂牌程序
-
当有疑问时, 咨询有执照的电工.