
저자: 데니스 Ruest, P.Eng/IPQDF
스킬 레벨: 고급 DIY (전기 관련 경험이 필요합니다)
전압: 120/240V 분할 위상
시스템 크기: 5kW 급 (킬로와트)
1. 소개: 목표 이해
5kW 태양광 시스템은 대부분의 중형 가정에 전력을 공급할 수 있는 상당한 투자입니다.. 사용14 패널 (보다는 13) 균형 잡힌 문자열 구성을 생성합니다. 즉, 두 개의 동일한 문자열 7 각 패널 - 배선 단순화, 전기적 균형 개선, 문제 해결이 더 쉬워집니다..
부품을 구입하기 전에, 당신은 결정해야합니다: 그리드 연결 또는 오프 그리드?
- 그리드 연결: 유틸리티에 계속 연결되어 있습니다. 전력을 다시 판매할 수 있습니다. (순미터링) 하지만 안전을 위해 전력망이 중단되면 시스템이 종료됩니다. (단독운전 방지). 5kW 그리드 연결 시스템은 일반적으로 20-25 하루 kWh, 평균 가구 사용량을 상쇄하기에 충분합니다..
- 오프 그리드: 당신은 유틸리티로부터 완전히 독립되어 있습니다. 상당한 배터리 뱅크가 필요합니다. (48V @ 200Ah 이상). 시스템이 실행됩니다. 24/7 그리드에 관계없이. 5kW 오프그리드 시스템으로 냉장고 작동 가능, 허파, 전자 공학, 심지어 작은 에어컨이나 주기적인 우물 펌프도 마찬가지입니다..
책임의 한계: 전기로 작업하는 것은 위험하다. 최종 연결에 대해서는 자격을 갖춘 전기 기술자에게 문의하십시오.. 이 규모의 시스템에 대해서는 해당 지역 관할권에서 허가가 필요합니다.. 이 기사는 정보 제공의 목적으로 작성되었으며 면허가 있는 전문가를 대체하지 않습니다..
2. 왜 14 패널? 짝수 장점
사용 14 패널 (두 개의 문자열 7) 비해 상당한 이점을 제공합니다. 13 패널:
| 특징 | 13 패널 (7+6) | 14 패널 (7+7) |
|---|---|---|
| 스트링 밸런스 | 같지 않은 문자열 | 완벽한 균형 |
| 전압 매칭 | 다양한 스트링 전압 | 동일한 스트링 전압 |
| 결합기 상자 | 다른 융합이 필요함 | 두 문자열 모두에 대해 동일한 융합 |
| 성능 | 하나의 문자열은 더 적은 양을 생산합니다. | 둘 다에서 동일한 생산 |
| 확장성 | 어색한 구성 | 나중에 쌍을 쉽게 추가할 수 있음 |
| 총 전력 | ~5.0kW (385W 패널 탑재) | ~5.4kW (385W 패널 탑재) |
과 14 x 385W 패널, 당신은 얻는다5,390에—a nice buffer above 5kW that helps on cloudy days without overloading most 5kW inverters (which typically accept up to 6,000W DC input).
3. Tools & Materials Checklist
Tools Required:
- Drill & Impact Driver with hex bits
- Socket Set & Wrenches (metric and standard)
- Wire Strippers/Cutters (10 AWG to 2/0 AWG capable)
- Digital Multimeter with DC voltage capability up to 600V
- PV (태양의) Safety Gloves (insulated)
- Torque Wrench (inch-pounds and foot-pounds)
- Stud Finder (electronic)
- Chalk Line
- Conduit Bender (1/2″ and 3/4″)
- Fish Tape
- Cable Lugs Crimping Tool (hydraulic recommended for battery cables)
Materials for a 5kW System (14 패널):
Solar Array:
- Solar Panels: 14x 360W-400W panels (total 5.0-5.6kW). Choose high-efficiency monocrystalline panels to minimize roof space.
- Racking System: Aluminum rails, L-feet, mid-clamps, end-clamps, flashing (IronRidge, Unirac, or SnapNrack). Ensure rated for wind/snow loads in your area.
- 접지: Grounding lugs, WEEB washers, or copper wire.
DC Electrical:
- 결합기 상자: Weatherproof enclosure with 2-string capability.
- String Fuses: 15A fuses or breakers for each string (2 필요, identical ratings).
- PV Wire: 10 AWG or 8 AWG for panel interconnections, 6 AWG for home run.
- DC Disconnect: 30A or 60A outdoor-rated safety switch.
Inverter:
- Grid-Tied Option: 5kW String Inverter (SMA, SolarEdge, Fronius) or 5kW of Microinverters (Enphase IQ8+). Verify max DC input accommodates ~5.4kW.
- Off-Grid Option: 5kW Split-Phase All-in-One Unit with built-in charge controller (Growatt SPF 5000 ES, MPP Solar LVX6048, Victron MultiPlus-II). Must accept 48V DC input.
AC Electrical:
- AC Breaker Panel: Main panel or sub-panel.
- Double-Pole Breaker: 30A for solar backfeed.
- THHN Wire: 10 AWG copper (color-coded: 검은, 붉은, white, green).
- AC Disconnect: Outdoor-rated safety switch (if required by code).
Off-Grid Only:
- Battery Bank: 48V Lithium Iron Phosphate (LiFePO4) 배터리. Minimum 100Ah (5kWh), Recommended 200Ah (10kWh) for overnight loads. Examples: EG4 LL, Trophy Battery, Pylontech.
- Battery Cables: 2/0 AWG or 4/0 AWG welding cable with lugs.
- Class-T Fuse: 250A or 300A with holder.
- Busbars: Heavy-duty copper busbars for battery connections.
- Battery Rack: Server rack or shelf system.
Consumables:
- Wire nuts / Wago connectors
- Cable ties (UV-resistant for outdoors)
- Conduit (Schedule 40 PVC or EMT)
- Penetration sealant (roofing caulk)
- Electrical tape
- Label maker / UV-resistant labels
4. System Design & Layout (The Paperwork Phase)
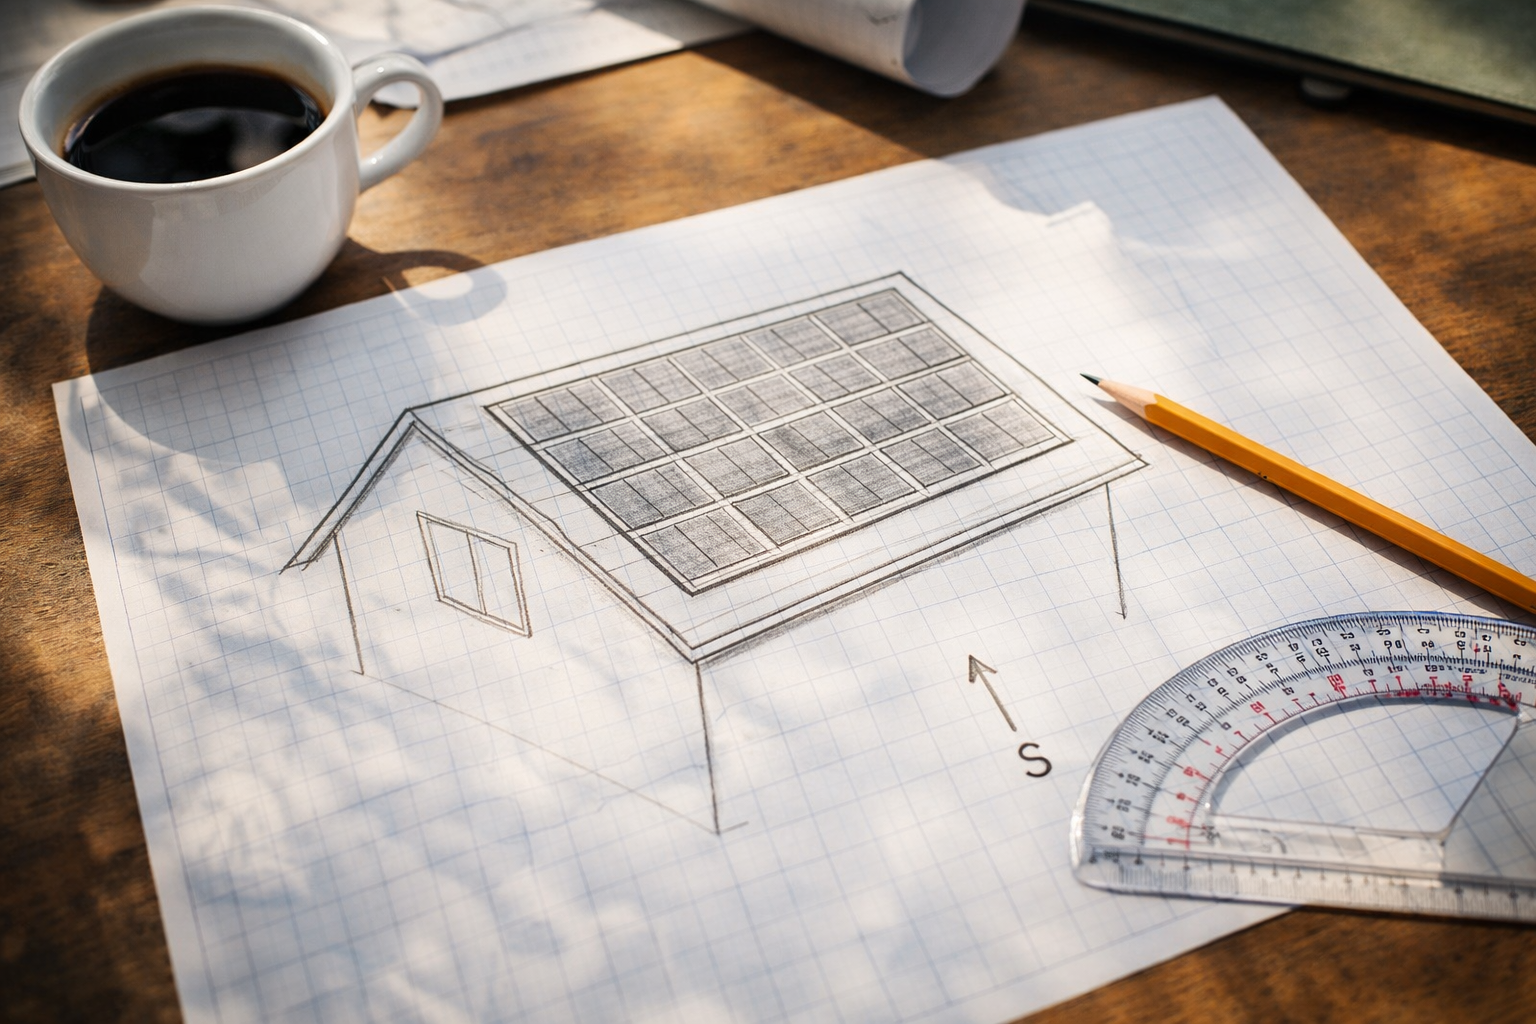
[영상: A sketch on graph paper of a roof with 14 panels arranged in two neat rows of 7, south arrow, and string diagram]
Before lifting a single panel, you must complete the design on paper. This is required for permits and ensures your components work together safely.
단계 4.1: Roof Assessment
- 정위: South-facing is best in the Northern Hemisphere. Southeast or Southwest will lose 10-15% production.
- Pitch: Most roofs work, but steep pitches (greater than 45°) require special safety equipment.
- Condition: Ensure your roof has at least 10 years of life remaining. Re-roofing after solar installation is expensive.
- Obstructions: Measure distances from chimneys, vents, and skylights. You need 18-36 inches of clearance around the array for fire access (check local codes).
- Layout: 과 14 패널, you can arrange them in two rows of 7 (landscape orientation) or seven rows of 2 (portrait orientation). Two rows of 7 is most common.
단계 4.2: String Sizing Calculation (Perfect Balance)
과 14 패널, you create two identical strings of 7 panels each.
- Panel Voltage: Most modern 400W panels have a Voc (open circuit voltage) around 40-45V.
- String A: 7 panels x 45V = 315V (operating) / 365에 (max cold temp)
- String B: 7 panels x 45V = 315V (operating) / 365에 (max cold temp)
- 총 전력: Both strings combine in parallel at the combiner box, producing identical voltage and balanced current.
Critical: Use a string sizing calculator (available on inverter manufacturer websites) with your location’s record low temperature. Cold increases voltage and can destroy your inverter if not calculated correctly. With 7-panel strings, you’ll have plenty of safety margin below the typical 600V max inverter input.
단계 4.3: Production Estimate
A 5.4kW system (14 x 385W) in an area with 5 peak sun hours will generate:
- Daily: 5.4kW x 5hrs x 0.8 (system losses) = 21.6 kWh/day
- Monthly: 21.6 kWh x 30 = 648 kWh/month
- Annually: Varies by season, 일반적으로 7,000-9,000 kWh/year
This covers 60-100% of an average home’s usage depending on efficiency.
단계 4.4: Permitting
Visit your local building department with:
- Site plan showing roof dimensions
- Panel layout diagram (14 panels clearly shown)
- Electrical one-line diagram
- Equipment spec sheets
- Structural calculations (if required)
Wait for approval before purchasing equipment or starting installation.
5. Install the Racking (Mounting Hardware)
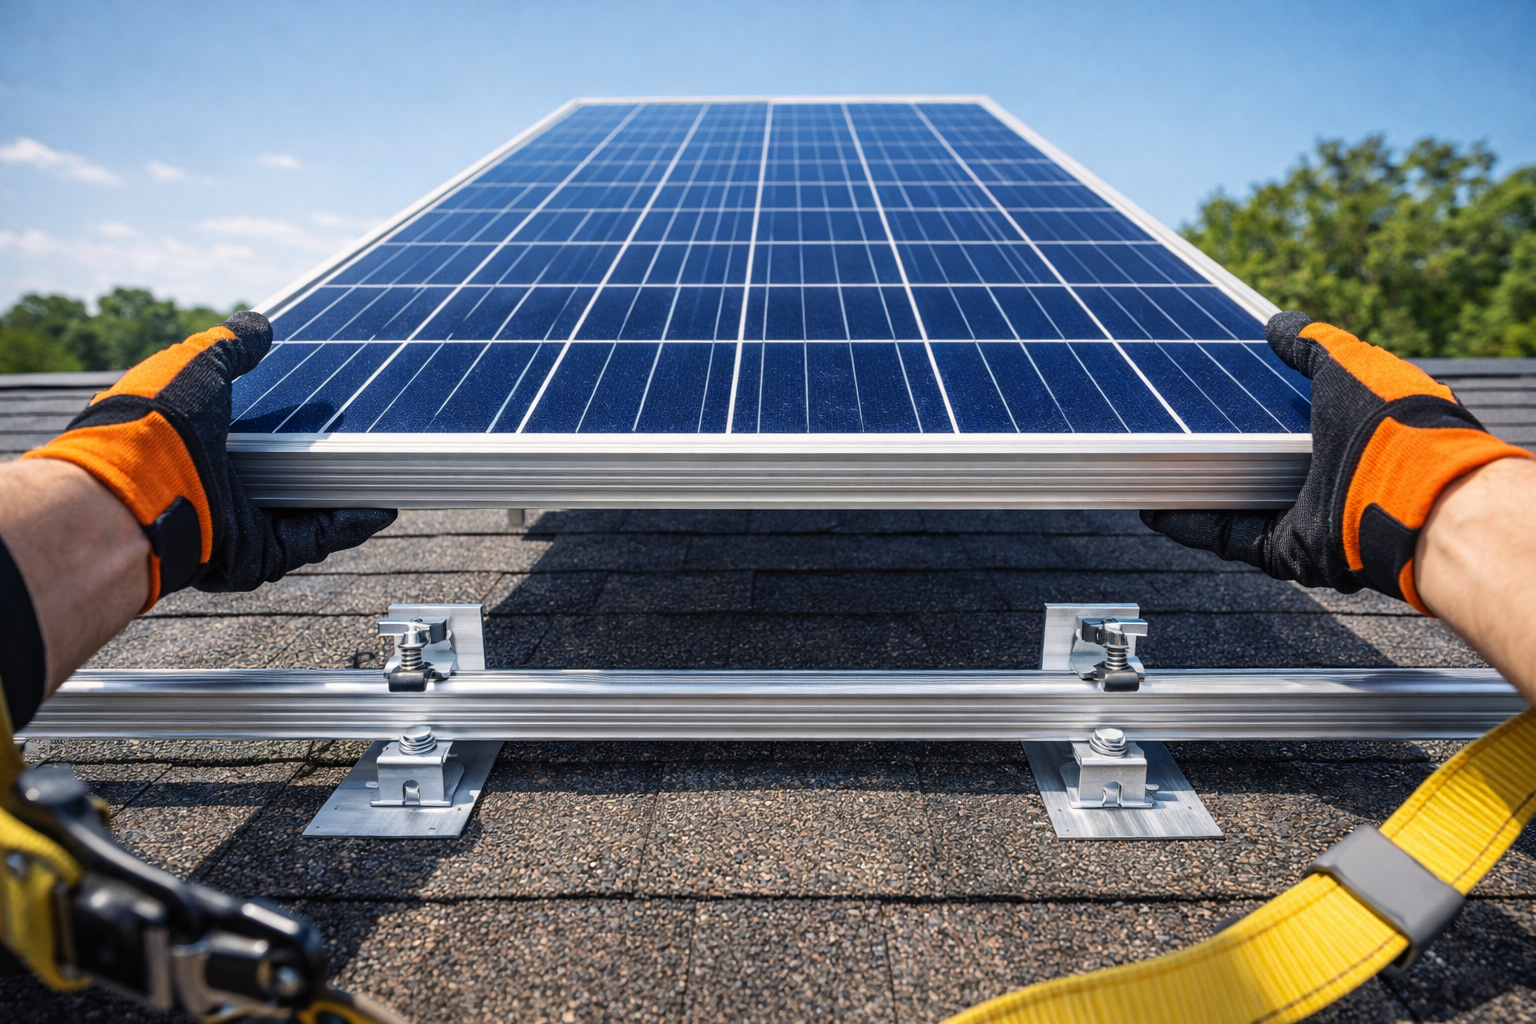
[영상: 서까래에 박힌 래그 볼트를 사용하여 들어 올려진 지붕널 아래에 설치된 후레싱, 눈에 보이는 안전벨트]
랙킹 시스템은 태양전지 어레이의 기초입니다.. 5kW 시스템 14 패널의 무게는 대략 650-850 파운드이고 바람의 양력을 견뎌야 합니다..
단계 5.1: 서까래 찾기
- 서까래를 찾으려면 전자 스터드 파인더를 사용하세요.. 지붕 부분에 분필 선으로 표시하십시오..
- 표준 서까래 간격은 24입니다.″ 중앙에. 간격이 더 넓다면, 구조적 보강이 필요하다.
- 모든 서까래 위치를 명확하게 표시하십시오. 모든 장착 지점에 필요합니다..
- 용 14 두 줄의 패널, 레일과 서까래 교차점마다 장착 지점이 필요합니다..
단계 5.2: 플래싱 설치
- 마운트가 들어갈 위치에서 대상포진을 조심스럽게 들어올립니다.. 대상포진이 깨지는 것을 방지하려면 플랫 바를 사용하세요..
- 알루미늄 후레싱을 지붕널 아래로 완전히 밀어 넣습니다., with the top edge under the course above.
- 후레싱에는 실런트가 내장되어 있거나 그 아래에 루핑 코킹을 적용해야 합니다..
단계 5.3: L-피트 부착
- 후레싱을 통과하여 서까래 중앙에 파일럿 구멍을 뚫습니다.. 너무 깊게 드릴링하는 것을 방지하려면 드릴 비트에 스톱을 사용하세요..
- 래그 볼트 삽입 (일반적으로 3/8″ 4개″ 스테인레스 스틸) 세탁기가 내장되어 있어서.
- 단단히 조이되 과도한 토크를 가하지 마십시오.. 목표는 플래싱을 변형시키지 않고 압축하는 것입니다..
- 추가 루핑 코크로 볼트 헤드를 밀봉합니다..
단계 5.4: 레일 설치
- T 볼트와 캡을 사용하여 알루미늄 크로스 레일을 L 피트에 부착합니다..
- 용 14 두 줄로 된 패널 7, 어레이의 전체 너비를 실행하는 두 개의 수평 레일이 필요합니다.
- 레일이 좌우 및 앞뒤로 완벽하게 수평인지 확인하십시오.. 4피트 높이를 사용하세요.
- 런이 사용 가능한 레일 길이보다 긴 경우 내부 스플라이스를 사용하여 레일 섹션을 결합하세요.. 접합이 단단하고 직선인지 확인하십시오..
안전 수칙: 항상 루프 앵커가 달린 안전벨트를 착용하세요.. 지붕에서 떨어지면 치명적일 수 있음.
6. 태양광 패널 장착
단계 6.1: 패널을 안전하게 스테이지
- 패널 리프터를 사용하여 패널을 지붕 위로 들어 올리기, 지붕 후크, 아니면 조심스럽게 건네주거나.
- 과 14 패널, 체계적으로 작업합니다. 한 번에 한 행씩 스테이지 패널을 만듭니다..
- 배선을 준비하는 동안 유리를 보호하기 위해 패널을 폼 패드 위에 뒤집어 놓습니다..
단계 6.2: 사전 배선 (선택사항이지만 권장됨)
- 접근 가능한 경우, 장착하기 전에 MC4 확장 케이블을 패널 정션 박스에 연결하십시오..
- 패널을 장착할 때보다 지면에서나 패널을 뒤집은 상태에서 작업하는 것이 더 쉽습니다..
- 용 14 패널, 당신은 가질 것이다 14 긍정적이고 14 부정적인 결과는 조직화로 이어집니다.
단계 6.3: 위치 패널
- 배열의 한쪽 모서리에서 시작. 첫 번째 패널을 레일 위에 놓습니다..
- 줄 전체에 걸쳐 작업, 그런 다음 두 번째 행을 시작하세요.
- 패널은 프레임이 클램프 위에 놓이도록 레일 위에 놓여야 합니다..
단계 6.4: 클램프로 고정
- 미드클램프: 패널 사이에 사용. 인접한 두 패널의 프레임을 레일에 고정합니다.. 대략적으로 필요합니다. 22 mid-clamps.
- 엔드클램프: 마지막 패널을 고정하기 위해 각 레일의 끝 부분에 사용됩니다.. 당신은 필요합니다 4 레일당 엔드 클램프 (8 총).
- 모든 클램프를 제조업체 사양에 맞게 토크로 조이세요. (일반적으로 15-20 ft-lbs). 토크가 부족하면 패널이 날아갈 위험이 있습니다.; 과도한 토크로 인해 프레임이 깨질 수 있습니다..
단계 6.5: 어레이 접지
- WEEB 사용 (세탁기 전기용품 채권) 레일 및 패널 프레임의 양극 산화 코팅을 관통하는 클립.
- 대안으로, 나열된 접지 러그를 사용하여 각 레일에 연속된 구리 접지선을 연결합니다..
- 어레이 접지를 집의 접지 전극 시스템에 연결하십시오..
7. 전기 배선 (DC측)
[영상: 함께 딸깍 소리가 나는 MC4 커넥터의 클로즈업, 그런 다음 보여주는 다이어그램 2 동일한 문자열 7 패널이 결합 상자에 병합됨]
과 14 패널, 완벽하게 일치하는 두 개의 문자열을 생성합니다. 7 panels each.
단계 7.1: 문자열 구성
- String A (7 패널): 긍정적인 연결 (+) 패널의 1 부정적인 (-) 패널의 2, 등등 모든 것을 통해 7 패널. 끝에는 하나의 자유 긍정과 하나의 자유 부정이 있을 것입니다..
- String B (7 패널): 나머지 부분에 대해서도 이 과정을 반복하세요. 7 패널, 같은 패턴을 따라.
단계 7.2: 전압체크
- 인버터에 연결하기 전에, 화창한 날에 멀티미터로 각 스트링 전압을 측정합니다..
- 스트링 A는 약 280-320V DC를 읽어야 합니다. (패널 사양 및 햇빛에 따라 다름).
- 문자열 B는 읽어야 합니다. 동일한 전압 문자열 A로 (1-2V 이내).
- 기록을 위해 이 값을 기록해 두세요.. 전압이 일치하면 배선이 올바른지 확인됩니다..
단계 7.3: 결합기 상자에 전선 연결
- 각 스트링의 양극선과 음극선을 결합기 상자 위치까지 연결합니다. (일반적으로 어레이 가장자리 근처 또는 아래 벽에 있습니다.).
- Use PV wire rated for outdoor exposure and sunlight.
- Label each wire pair clearly: “String A +”, “String A -“, “String B +”, “String B -“.
단계 7.4: Install Combiner Box
- Mount the weatherproof combiner box on the wall near the array or on the roof edge.
- Inside the box, connect each string positive to a 15A fuse or breaker (identical for both strings).
- Connect each string negative to a common negative busbar.
- The combined output goes to a single positive and negative wire (the “home run”).
단계 7.5: Run Home Run to DC Disconnect
- From the combiner box, run 6 AWG PV wire (positive and negative) down to the DC disconnect switch mounted outside near the inverter.
- Use conduit for protection where wires are exposed.
- Label this wire “PV Array Output 5.4kW” at both ends.
8. Mount the Inverter & AC Panel
단계 8.1: Select Location
- Indoors (garage/basement) is ideal for inverter longevity.
- 실외에는 NEMA 4X 정격 인버터가 필요합니다..
- AC 배선을 최소화하려면 위치가 주 전기 패널과 가까워야 합니다..
- 독립형용, 위치는 배터리 뱅크와 가까워야 합니다. (배터리 케이블은 짧아야 합니다).
단계 8.2: 백보드 설치
- 4를 마운트′ 4개′ 3/4 시트″ 벽에 합판. 규정에 따라 필요한 경우 난연성 페인트로 칠하십시오..
- 견고한 장착 표면을 제공하고 장비를 정리합니다..
단계 8.3: 인버터 장착
- 인버터 무게: 5kW 단위 무게 50-100 파운드. 래그 볼트를 스터드에 사용.
- 제조업체가 지정한 여유 공간 유지 (일반적으로 6-12 모든 면에서 인치) 공기 흐름을 위해.
- 인버터가 수평인지 확인하십시오..
단계 8.4: AC 패널 장착
- 임계 부하에 서브 패널을 사용하는 경우 (독립형), 인버터 옆에 설치하세요..
- 메인 패널을 백피드하는 경우 (격자무늬로 묶인), 메인 패널에 열린 이중 극 차단기 슬롯이 있는지 확인하십시오..
단계 8.5: 연결 끊기 설치
- DC 연결 해제 장착 (컴바이너 박스와 인버터 사이) 인버터가 보이는 곳에.
- AC 연결 해제 장착 (인버터와 메인 패널 사이) 지역 규정에 따라 필요한 경우.
9. 배터리 뱅크 배선 (Off-Grid Only)
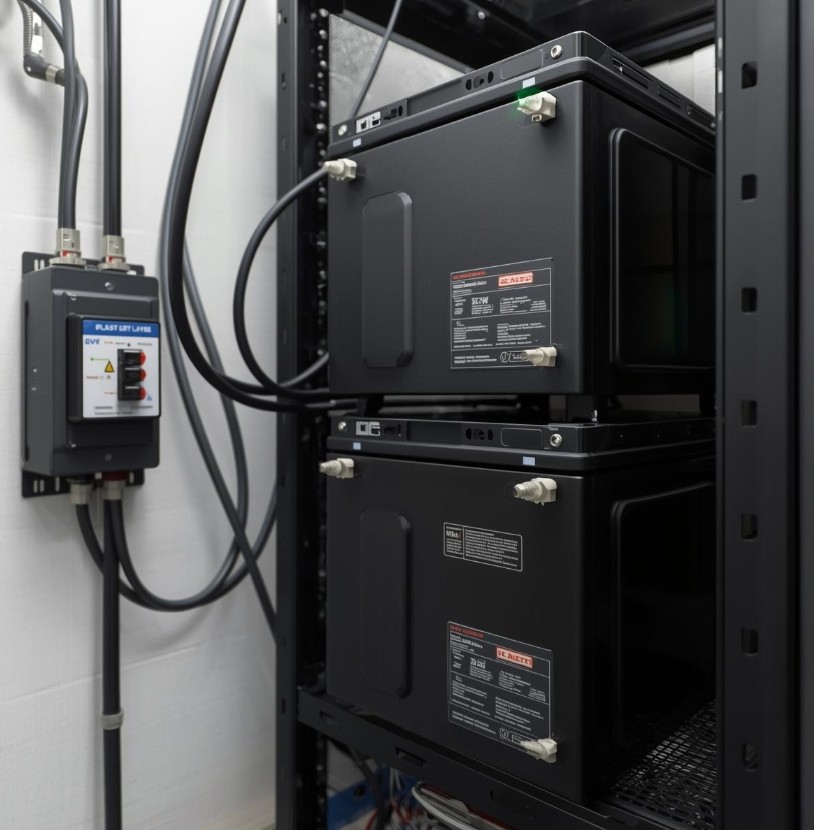
[영상: 48V를 생성하기 위해 직렬 병렬로 연결된 파란색 리튬 배터리 랙, 무거운 케이블과 클래스 T 퓨즈 포함]
48V에서 5kW 인버터가 소비됩니다.104 앰프 최대 부하에서. 이를 위해서는 심각한 케이블 연결과 안전 보호가 필요합니다..
단계 9.1: 배터리 구성 선택
- 48V 시스템: 대부분의 5kW 오프 그리드 인버터에는 48V 배터리 뱅크가 필요합니다..
- 용량: 5kW 부하를 밤새 작동하려면 (말하다 10 부분 부하 시 시간), 최소 10kWh의 저장 공간이 필요합니다..
- 일반적인 설정 14 패널: 5.4kW의 태양광으로, 상당한 배터리 뱅크를 충전할 수 있습니다. 추천: 48@ 200Ah에서 (10kWh) 최저한의, 48V @ 300Ah (15kWh) 이상적인.
- 구성 옵션:
- 4x 12V 200Ah 배터리 직렬 = 48V @ 200Ah (10kWh)
- 8x 12V 200Ah 직렬 병렬 = 48V @ 400Ah (20kWh)
- 3x 48V 서버 랙 배터리 병렬 = 48V @ 300Ah (15kWh)
단계 9.2: 배터리 위치
- 랙이나 선반에 배터리를 놓으십시오.. 콘크리트 바닥에 직접 놓지 마십시오. (추위가 그들을 손상시킬 수 있다).
- 적절한 환기를 보장하십시오. 배터리에서 가스가 배출될 수 있습니다. (결함이 있는 리튬에도) 그리고 열을 발생시키다.
단계 9.3: 와이어 배터리
- 사용 2/0 AWG 또는 4/0 AWG 모든 배터리 상호 연결을 위한 용접 케이블.
- 유압식 크림퍼를 사용하여 튼튼한 러그를 케이블에 압착합니다..
- 직렬 연결의 경우: 배터리 양극 연결 1 배터리 음극으로 2, 등.
- 병렬 스트링의 경우: 부스바에 모든 양극을 함께 연결하십시오., 부스바에 모든 네거티브를 함께.
단계 9.4: 클래스 T 퓨즈 설치
- 비판적인: 내부에 Class-T 퓨즈를 설치하십시오. 12 배터리 양극 단자의 인치.
- 퓨즈 크기: 인버터 최대 연속 전류 x 1.25 = 퓨즈 크기. 104A용 x 1.25 = 최소 130A. 대부분의 5kW 인버터는 서지 부하를 처리하기 위해 200A-250A 퓨즈를 사용합니다..
- The Class-T fuse protects against short circuits—batteries can deliver thousands of amps in a fault, causing fire or explosion.
단계 9.5: Connect to Inverter
- Run the positive cable from the fuse to the inverter battery positive terminal.
- Run the negative cable directly from the battery negative busbar to the inverter battery negative terminal.
- Torque all connections to manufacturer specifications.
단계 9.6: Install Battery Monitor (선택)
- Install a shunt-based battery monitor (Victron BMV-712 or similar) to track state of charge accurately.
- This is essential for off-grid living to know how much capacity remains.
10. AC Wiring (그리드 연결 & 오프 그리드)
[영상: An electrician wiring a 30A double-pole breaker in a main electrical panel, labeled “태양의”]
단계 10.1: Understand the Math
5,400 Watts at 240 Volts =22.5 앰프 continuous (at full 5.4kW output).
National Electrical Code requires circuits to be sized at 125% of continuous load:
- 22.5A x 1.25 = 28.1A
- 따라서, you need a 30A double-pole breaker (next standard size above 28.1A).
단계 10.2: Wire Gauge Selection
- For a 30A breaker, 사용 10 AWG copper wire (최저한의).
- If the run from inverter to main panel exceeds 100 feet, upgrade to 8 AWG to prevent voltage drop.
- Use color-coded THHN wire: Black (L1), Red (L2), White (Neutral), Green (바닥).
단계 10.3: Off-Grid Connection
- Run L1, L2, Neutral, and Ground from the inverter output to a dedicated “Critical Loads” sub-panel.
- In the sub-panel, install standard 15A and 20A breakers for circuits you want backed up (refrigerator, 허파, 인터넷, 기타).
- Transfer those circuits from the main panel to the sub-panel.
단계 10.4: Grid-Tied Connection (Backfeeding)
- Run L1, L2, Neutral, and Ground from the inverter output to the main service panel.
- Install the 30A double-pole breaker in an open slot at the opposite end of the panel from the main breaker (this helps with the 120% rule).
- Connect L1 to one terminal of the breaker, L2 to the other terminal. Connect Neutral to the neutral busbar, Ground to the ground busbar.
- Label the breaker “SOLAR 5.4kW” clearly so future electricians know it’s backfed.
단계 10.5: The 120% Rule (Critical for Grid-Tied)
- Your main panel busbar has a rating (usually 100A, 125A, or 200A).
- The sum of the main breaker and the solar backfeed breaker cannot exceed 120% of the busbar rating.
- Example: 125A busbar x 1.2 = 150A maximum. 100A main + 30A solar = 130A, which is acceptable.
- If your panel can’t accommodate this, you need a “Supply Side Tap” (connection before the main breaker), which requires an electrician.
11. Final Connections & Power-On Sequence
[영상: A person using a multimeter to check voltage at the DC disconnect before turning it on]
단계 11.1: Pre-Power Checks
- Visual Inspection: Check every wire connection. Look for loose strands, nicked insulation, or incorrect routing.
- Polarity Check: Verify positive goes to positive, negative to negative everywhere. Reversed polarity on a charge controller or inverter will destroy it instantly.
- Torque Check: Ensure all terminal screws are torqued to spec. Loose connections cause arcing and fires.
- 전압체크 (DC): Measure voltage at the DC disconnect. Both strings should show identical voltage (within 2V).
- 전압체크 (AC): Ensure main panel is energized and voltage is 120/240V ±5%.
단계 11.2: Turn-On Sequence (그리드 연결)
- Turn on the AC breaker from the main panel to the inverter (grid power).
- Wait for inverter display to power up and show grid parameters.
- Turn on the DC disconnect from the solar array.
- The inverter should detect solar power, synchronize with the grid (takes 2-5 분), and begin exporting.
- Verify display shows “Producing” 또는 “그리드 연결” mode with positive wattage. 과 14 패널, you should see 4.5-5.4kW near solar noon.
단계 11.3: Turn-On Sequence (오프 그리드)
- Ensure all AC loads are turned off.
- Turn on the DC battery breaker or disconnect first.
- Inverter screen should light up. Verify battery voltage reads correctly.
- Turn on the solar DC disconnect.
- The charge controller should activate and begin charging batteries (Bulk mode). Voltage should rise.
- Turn on the inverter AC output breaker.
- Test by turning on a small load (like a light). The inverter should power it.
- Gradually add larger loads to test system response.
단계 11.4: Observe Initial Operation
- Let the system run for 30 분. Watch for:
- Unusual noises (buzzing, arcing)
- Overheating components
- Error codes on the display
- Inverter fans cycling properly
- With balanced strings, both should contribute equally—check inverter display for per-string data if available.
12. 모니터링 & Performance Testing
[영상: A smartphone screenshot showing a solar monitoring app with 5.4kW production and 26.5 kWh daily total]
단계 12.1: Connect Monitoring
- Most modern inverters have Wi-Fi or Ethernet connectivity.
- Download the manufacturer’s app and create an account.
- Register the inverter using its serial number.
- Connect to your home network and verify data transmission.
단계 12.2: Verify Production
- On a clear day near solar noon, your 5.4kW system should produce 4.6kW 급 – 5.2kW 급 depending on:
- Panel temperature (hot panels produce less)
- Angle relative to sun
- Atmospheric conditions
- If production is significantly lower, check for shading issues or wiring problems.
- Compare the two strings—they should show nearly identical output.
단계 12.3: Daily/Annual Expectations
- Daily: 22-32 kWh depending on season
- Monthly: 660-960 kWh
- Annual: 8,000-11,000 kWh (varies by location)
단계 12.4: Off-Grid Specific Monitoring
- Track battery state of charge daily.
- Note what time batteries reach full charge (indicates array sizing adequacy).
- Note what time batteries reach low charge (indicates if more capacity needed).
- Adjust usage habits if needed to stretch through the night.
13. Labeling & 문서
[영상: A clean electrical panel with professionally printed labels on every breaker and wire]
Code requires specific labeling for safety:
Required Labels:
- DC Disconnect: “PHOTOVOLTAIC SYSTEM DISCONNECT – 5.4kW DC”
- AC Disconnect: “SOLAR AC DISCONNECT – 5.4kW 급”
- Backfed Breaker: “SOLAR 5.4kW” (on the breaker itself)
- Main Panel: Warning label stating “THIS EQUIPMENT SUPPLIED BY MULTIPLE SOURCES – SOLAR 5.4kW” (if backfeeding)
- Inverter: Manufacturer label with ratings visible
- 결합기 상자: “STRING A (7 PANELS)” 과 “STRING B (7 PANELS)” on each fuse
- All Conductors: Identify at each termination point with voltage and source
Documentation to Keep:
- Permit approval documents
- Equipment manuals
- One-line diagram with actual wire lengths noted
- Warranty information
- Monitoring login credentials
- Emergency shutdown procedure (post near main panel)
- Panel layout diagram showing which panels belong to which string
14. Common Mistakes to Avoid
Mistake #1: Undersizing Wire
- A 5.4kW system pulls serious current. 사용 14 AWG wire for battery connections or long DC runs causes voltage drop and fire risk.
- 용액: Always use voltage drop calculators and follow NEC ampacity tables. 과 14 패널, your home run current is higher—use 6 AWG minimum.
Mistake #2: Ignoring Temperature Effects on Voltage
- Cold temperatures increase panel voltage. Panels rated 40V at 25°C can reach 48V at -10°C.
- 용액: Calculate string voltage using the record low temperature for your area. With 7-panel strings, you have good safety margin.
Mistake #3: Mixing Panel Types in Strings
- Panels in series must have the same amperage. Panels in parallel must have the same voltage.
- 용액: Buy identical panels for the entire 14-panel array. Don’t mix old and new.
Mistake #4: Skipping the Battery Fuse (오프 그리드)
- Batteries can deliver thousands of amps in a short circuit. Without a fuse, wires will melt and cause fire.
- 용액: Always install a Class-T fuse within 12 배터리 양극 단자의 인치.
Mistake #5: Not Torquing Connections
- “Hand tight” is not acceptable for electrical connections. Loose connections arc, overheat, and fail.
- 용액: Use a torque wrench on every lug and terminal. Record torque values.
Mistake #6: Improper Grounding
- Solar arrays can build up static charge and are vulnerable to lightning.
- 용액: Bond all metal parts (울타리, panel frames) and connect to the home’s grounding electrode system.
Mistake #7: Forgetting the 120% Rule (그리드 연결)
- Overloading the main panel busbar is a fire hazard.
- 용액: Calculate busbar rating, main breaker size, and solar breaker size before installing.
Mistake #8: Unbalanced Strings
- 과 14 패널, you have the opportunity for perfect balance. Don’t create uneven strings.
- 용액: Keep both strings at 7 panels each for identical voltage and current.
15. When to Call a Professional
While this guide is for DIY enthusiasts, certain tasks require licensed electricians:
- Main Panel Modifications: If you need to replace the main panel or move the main breaker.
- Supply Side Taps: If your panel can’t accommodate the 120% rule, a supply-side connection requires utility involvement and professional installation.
- Service Upgrade: If your main service is too small (예를 들면, 60A service) to handle solar plus existing loads.
- Utility Meter Socket Work: Anything that requires pulling the meter or modifying the meter socket.
- Final Inspection: Many jurisdictions require a licensed electrician to pull the permit and perform final connections.
16. System Specifications Summary
| 구성 요소 | Specification |
|---|---|
| 시스템 크기 | 5.4 kW DC (385W 패널 탑재) |
| 패널 | 14x 360W-400W monocrystalline |
| Roof Space Required | ~250-280 sq ft |
| String Configuration | 2 strings of 7 패널 (perfectly balanced) |
| String Voltage | Each string: ~315V operating / ~365V max |
| DC Wire (Home Run) | 6 AWG PV wire |
| Inverter Output | 5,000W continuous @ 240V (accepts 5.4kW DC) |
| AC Breaker Size | 30A double-pole |
| AC Wire | 10 AWG (8 AWG for long runs) |
| Battery (오프 그리드) | 48V @ 200Ah minimum (10kWh) |
| Battery Cable (오프 그리드) | 2/0 AWG or 4/0 AWG |
| Battery Fuse (오프 그리드) | Class-T, 200A-250A |
| Daily Production | 22-32 kWh (varies by location) |
17. 결론
A 5kW solar system using 14 panels offers the perfect balance of power output and electrical symmetry. With two identical strings of 7 panels each, 당신은 얻는다:
- Simpler wiring with identical components
- Better performance with balanced power production
- Easier troubleshooting when both strings behave identically
- More power (5.4kW vs 5.0kW) for minimal additional cost
- Future expansion potential by adding pairs of panels
When properly installed, this system will provide clean energy for 25+ 년, reduce or eliminate electric bills, and increase your energy independence.
Final Safety Reminder:
-
Obtain all required permits before starting
-
Work with a partner—never alone on a roof or with high voltage
-
Use lockout/tagout procedures when working on electrical panels
-
When in doubt, consult a licensed electricien.